Requirements
This tutorial will show you how to manage your BBU and RU on the Rapid.Space panel.
Find your services

- Enter your project (Projects on the left menu -> click your project name to enter)
- Click Instance Trees under JUMPS
- You can now type keyword on the top to find your target instance tree
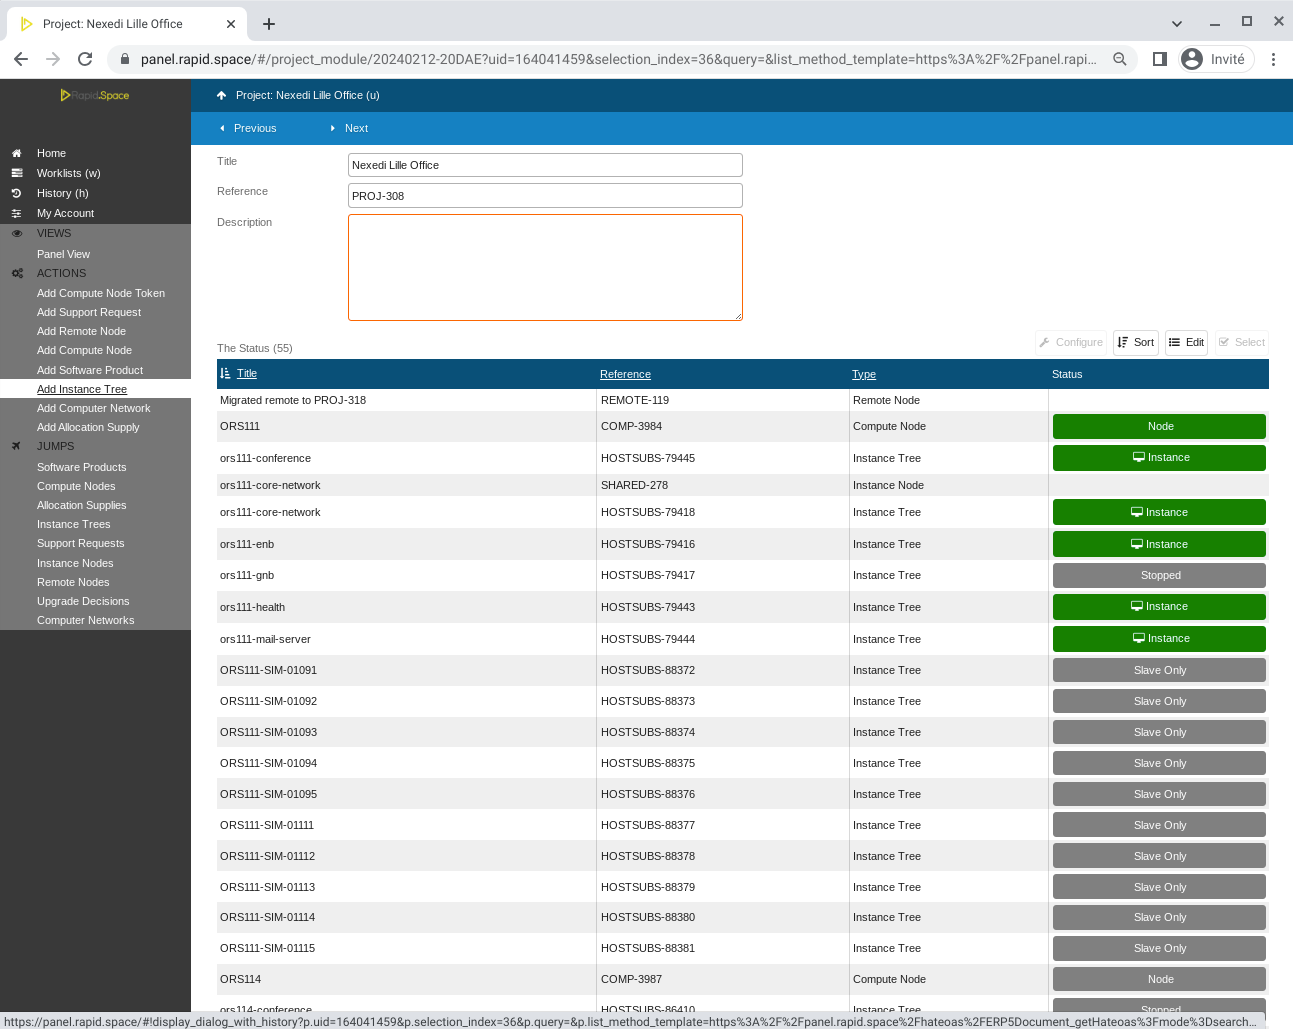
In the "Instance Tree" section, you will find the list of your services.
- BBUXX-enb or BBUXX-gnb and BBUXX-core-network: eNB, gNB (depending on your RU model, there might be only enb or gnb) and Core Network services running Amarisoft Stack
- BBUXX-conference and BBUXX-mail-server: PTT Video Conference and Mail Servers, please refer to the MCPTT tutorial
- BBUXX-health: here you will find many promises to check the health of your Edgepod (BBU) such as CPU temperature. We strongly recommend you keep this started, as we also use this service to monitor all BBUs on the panel.
By default, only one eNB or gNB service will be started, you should not run multiple gNB or eNB services at the same time as BBU can only run one at a time.
Here is the meaning of the "Status" button:
- Green means the service is currently running without any errors
- Orange or red means the service is running but has some errors (a following section will show you how to investigate)
- Grey means the service is stopped.
Find the compute node corresponding to your BBU

- Enter your project (Projects on the left menu -> click your project name to enter)
- Click Compute Nodes under JUMPS
- You can now type keyword on the top to find your target compute nodes
In this view, you will see all the compute nodes belonging to your project along with their status. You should see an entry corresponding to your BBU. This represents the physical BBU. If the "Node" status is green, it means your BBU is correctly connected to internet.
Switch between 4G and 5G (if needed)
To switch between LTE and NR, you can stop and start the enb and gnb services. First go to your service, then click on the "Request Start" or "Request Stop" button on the left panel. Both services should not be started at the same time as BBU do not support 4G and 5G simultaneously.
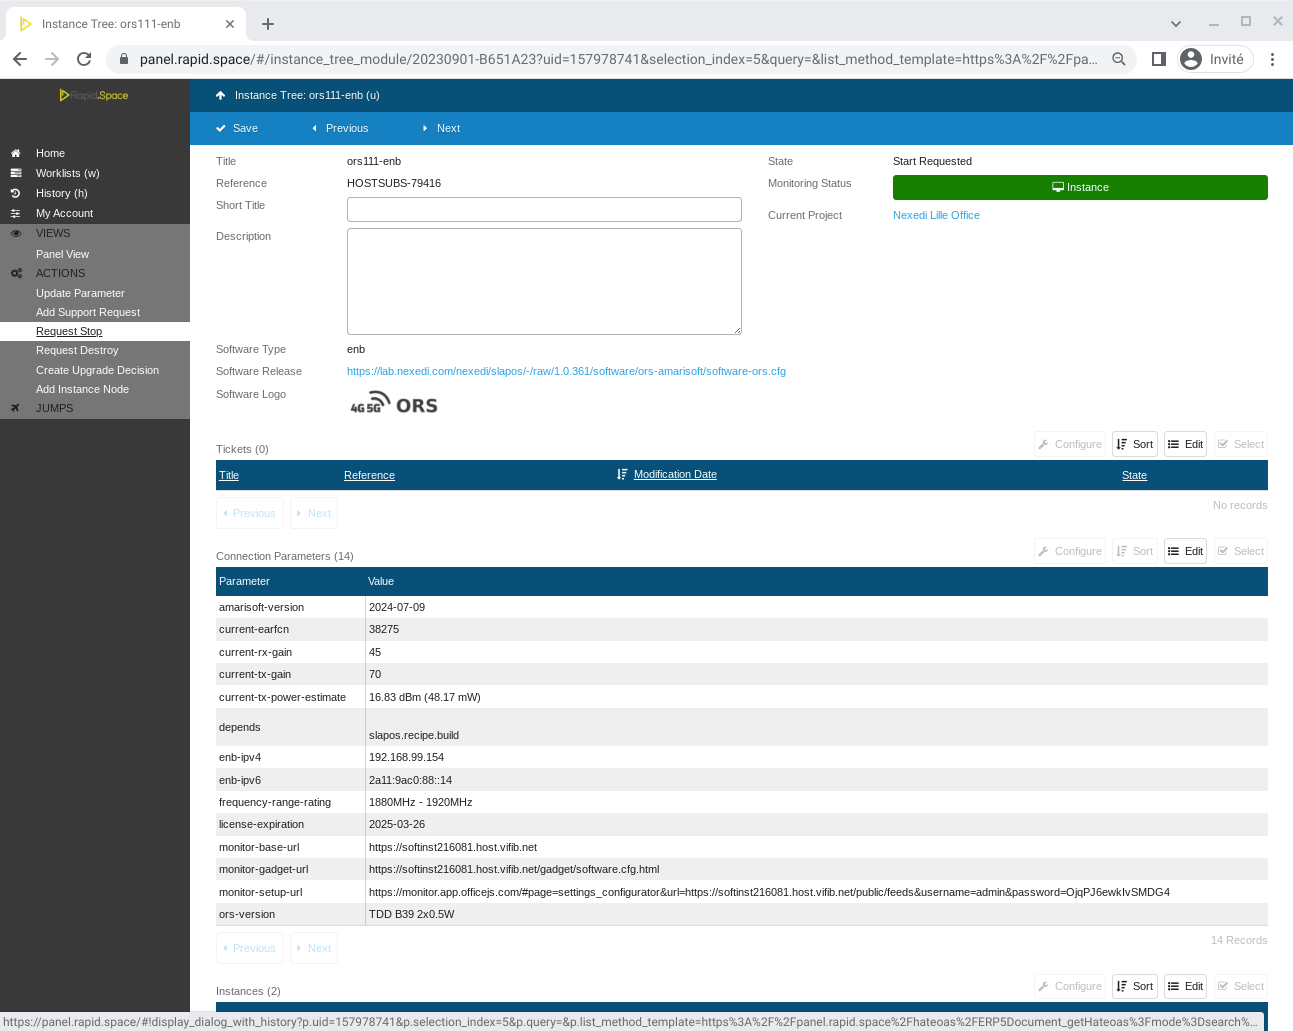
ENB Instance Tree: Change eNB ID, Add MME list, Add PLMN list(4G), Fluentbit configuration, Add SSH public key
In the ENB Instance Tree, Click Update Parameter

By default, all your services are configured with default parameters which should allow you to connect a phone without issue. However, you may want to customize these parameters to suit your needs.
You can modify the parameters of your service by going to your service and clicking the "Update Parameter" button on the left panel. Please read the sections below to get more details.
ENB Instance Tree
- Change eNB ID:
- eNB ID: The ID of eNB. It must be set if there are LTE cells. This input will also be used for Fluentbit Tag.
- Add MME list:
- MME list: List of MME to which the eNodeB is connected. (must be set if there are LTE cells)
- MME Address: IP address (and optional port) of S1AP SCTP connection to the MME. The default port is 36412.
- QCI DSCP Mapping Config: Enable preset QCI DSCP mapping config by selecting true
- Add PLMN list(4G):
- PLMN list(4G): List of PLMNs broadcasted by the eNodeB, at most 6. (must be set if there are LTE cells)
- Public Land Mobile Network: PLMN
- Reserved: True if the cell is reserved for operator use.
- Fluentbit configuration
- Address to Forward Xlog by Fluenbit: Address of Remote Fluentd or Fluentbit Server to Forward Xlog
- Port to Forward Xlog by Fluentbit: Optional Port of Remote Fluentd or Fluentbit Server to Forward Xlog
- tag: this parameter is not visible, but it uses the value of eNB ID
- Add SSH public key in order to connect to the SSH server of this instance
- Get ssh public key in RU (cat /mnt/update/etc/ in RU) to put on User Authorized Key
- It is used as a SFTP server for RU to download firmware to upgrade from BBU
ENB.CELL Instance Tree: Change bandwidth, frequency, etc...
In the ENB.CELL Instance Tree, Click Update Parameter

You can modify the parameters of your service by going to your service and clicking the "Update Parameter" button on the left panel. Please read the sections below to get more details.
The ENB.CELL instance operates in conjunction with the RU. Please keep in mind that this Cell configuration pertains to which specific RU:
ENB.CELL Instance Tree
ENB.RU Instance Tree: Adjust CPRI parameters, DL/UL antennas, TX gain, Carrier activation
In the ENB.RU Instance Tree, Click Update Parameter
You can modify the parameters of your service by going to your service and clicking the "Update Parameter" button on the left panel. Please read the sections below to get more details.
- [Obligation] Input RU MAC address:
- RU MAC address: RU MAC address used for NETCONF

ENB.RU Instance Tree
Adding Radio Unit / Cell / Peer / Peer Cell
Add Instance Tree -> Select ors-amarisoft -> Request

- Go to your project and click on "Add Instance Tree"
- Select ors-amarisoft software
- Click Request
Adding Radio Unit / Cell / Peer / Peer Cell
Select -> eNB/gNB | Radio Unit / Cell / Peer / Peer Cell as the Software Type

- Select -> eNB/gNB | Radio Unit / Cell / Peer / Peer Cell as the Software Type
Adding Radio Unit / Cell / Peer / Peer Cell
Select one of Radio Unit / Cell / Peer / Peer Cell as the shared instance type to attach to eNB/gNB

- Select one of Radio Unit / Cell / Peer / Peer Cell as the shared instance type to attach to eNB/gNB
Adding Radio Unit
Select Radio Unit as the shared instance type to attach to eNB/gNB

- Input a Title. Recommended to follow the convention: BBUNo.-ENB/GNB.RUNo.
- e.g. bbu0-ENB.RU4 to correspond bbu0-ENB.CELL4
- Select Radio Unit as the shared instance type to attach to eNB/gNB
- Select Lopcomm ORAN as Radio Unit
- ru_type: lopcomm
- ru_link_type: cpri
- Input RU information including:
- Number of DL antennas
- Number of UL antennas
- CPRI link settings:
- Mapping method of AxCs on the CPRI: hw
- /dev/sdr # of CPRI board
- SFP port # on the CPRI board
- CPRI line bit rate multipler: Select the CPRI line bit rate in terms of multiple of option 1 (614.4 Mbps). E.g set 4 for option 3, 8 for option 5 and 16 for option 7 (default: 16)
- Tx gain
- Rx gain
- Activate Tx/Rx
- RU MAC address: Necessary for Netconf to be working
- Select COMP-ID of your BBU as Computer: COMP-ID can be found in Servers.
- Click Request in the end
Adding Cell
Select Cell as the shared instance type to attach to eNB/gNB

- Input a Title. Recommended to follow the convention: BBUNo.-ENB/GNB.CELLNo.
- e.g. bbu0-ENB.CELL4 to correspond bbu0-ENB.RU4
- Select Cell as the shared instance type to attach to eNB/gNB
- Select LTE cell as Cell
- RF mode: FDD
- cell_type: lte
- Select Bandwidth
- Input DL EARFCN
- Input Tracking Area Code if needed
- Input Root Sequence Index if needed
- cell_kind: enb
- Input Physical Cell ID if needed
- Input Cell ID
- Radio Unit: Shared Radio Unit
- ru_type: ru_ref
- ru_ref: bbu0-ENB.RU4 (input the title of preconfigured RU)
- Select COMP-ID of your BBU as Computer: COMP-ID can be found in Servers:
- Click Request in the end
If you want to apply TOP config, click Object Properties, input top_config to Add. Then scroll down to find added top_config, select boolean as type and set it to true

Adding Peer (X2 Peer)
Select Peer as the shared instance type to attach to eNB/gNB

- Input a Title. Recommended to follow the convention: BBUNo.-ENB/GNB.x2peerNo.
- Select Peer eNB/gNB as the shared instance type to attach to eNB/gNB
- Select Peer eNB as Peer eNB/gNB
- peer_type: lte
- Input X2 Addres
- Select COMP-ID of your BBU as Computer: COMP-ID can be found in Servers:
- Click Request in the end
Adding Peer Cell
Select Peer Cell as the shared instance type to attach to eNB/gNB

- Input a Title. Recommended to follow the convention: BBUNo.-ENB/GNB.cellNo..peerNo.
- e.g. bbu0-ENB.cell4.peer1 to correspond bbu0-ENB.CELL4
- Copy and modify the values in Raw XML:
-
<?xml version='1.0' encoding='utf-8'?>
<instance>
  <parameter id="_">{
"cell_type": "lte",
"cell_kind": "enb_peer",
"cell_ref": "bbu0-ENB.cell4.peer1",
"pci": 14, "dl_earfcn": 6275,
"e_cell_id": "184921",
"tac": "15099",
"allowed_meas_bandwidth": 25
}</parameter>
</instance>
- Select COMP-ID of your BBU as Computer: COMP-ID can be found in Servers:
- Click Request in the end
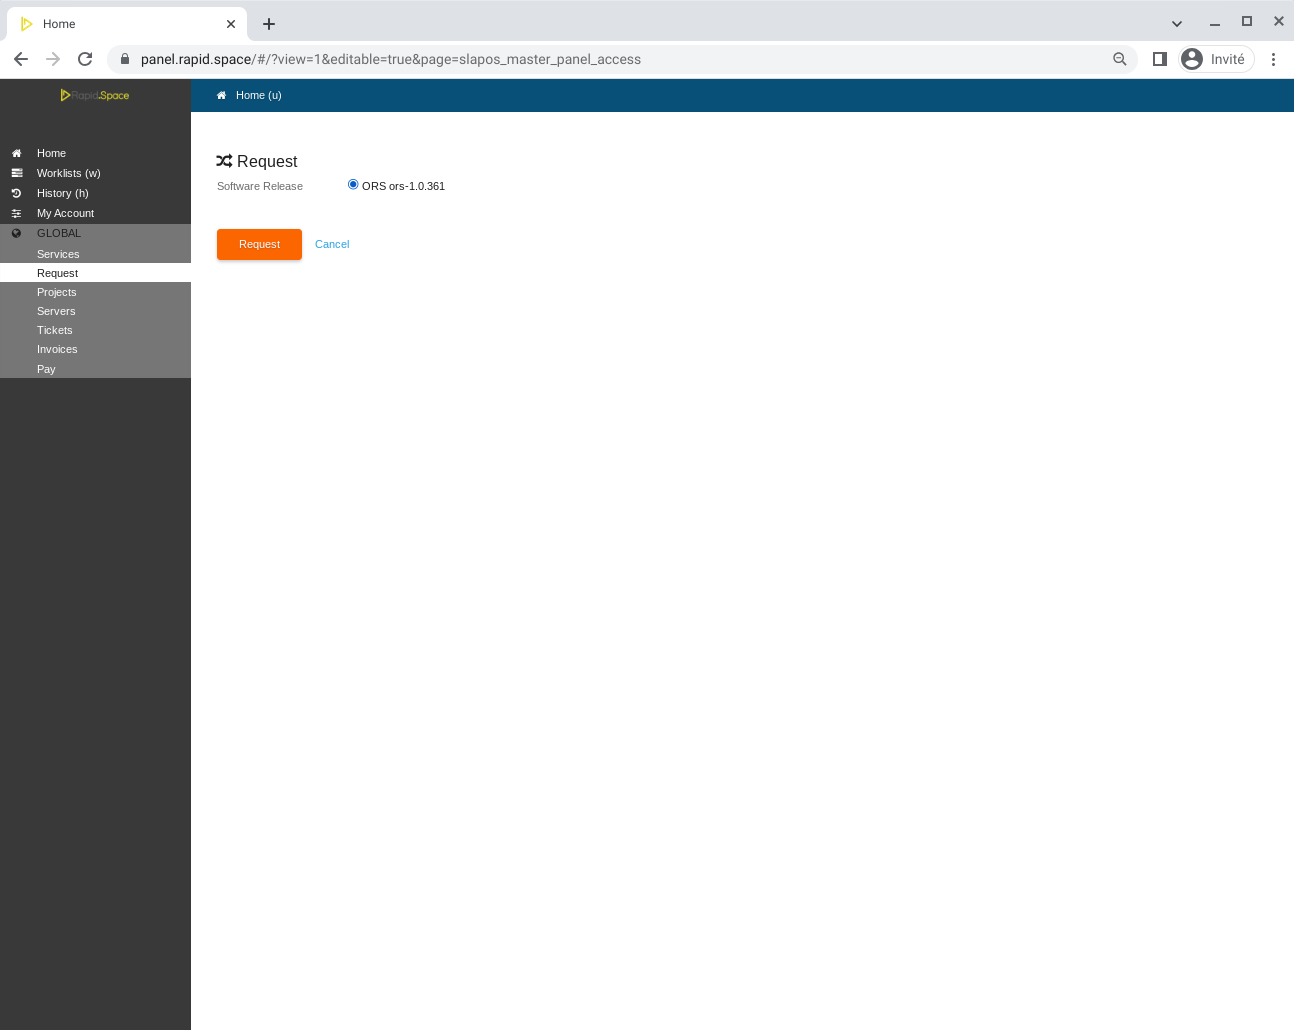
Add SIM Card
Click on Add Instance Tree
Go to your project and click on "Add Instance Tree"
Select ORS software
Select the computer reference
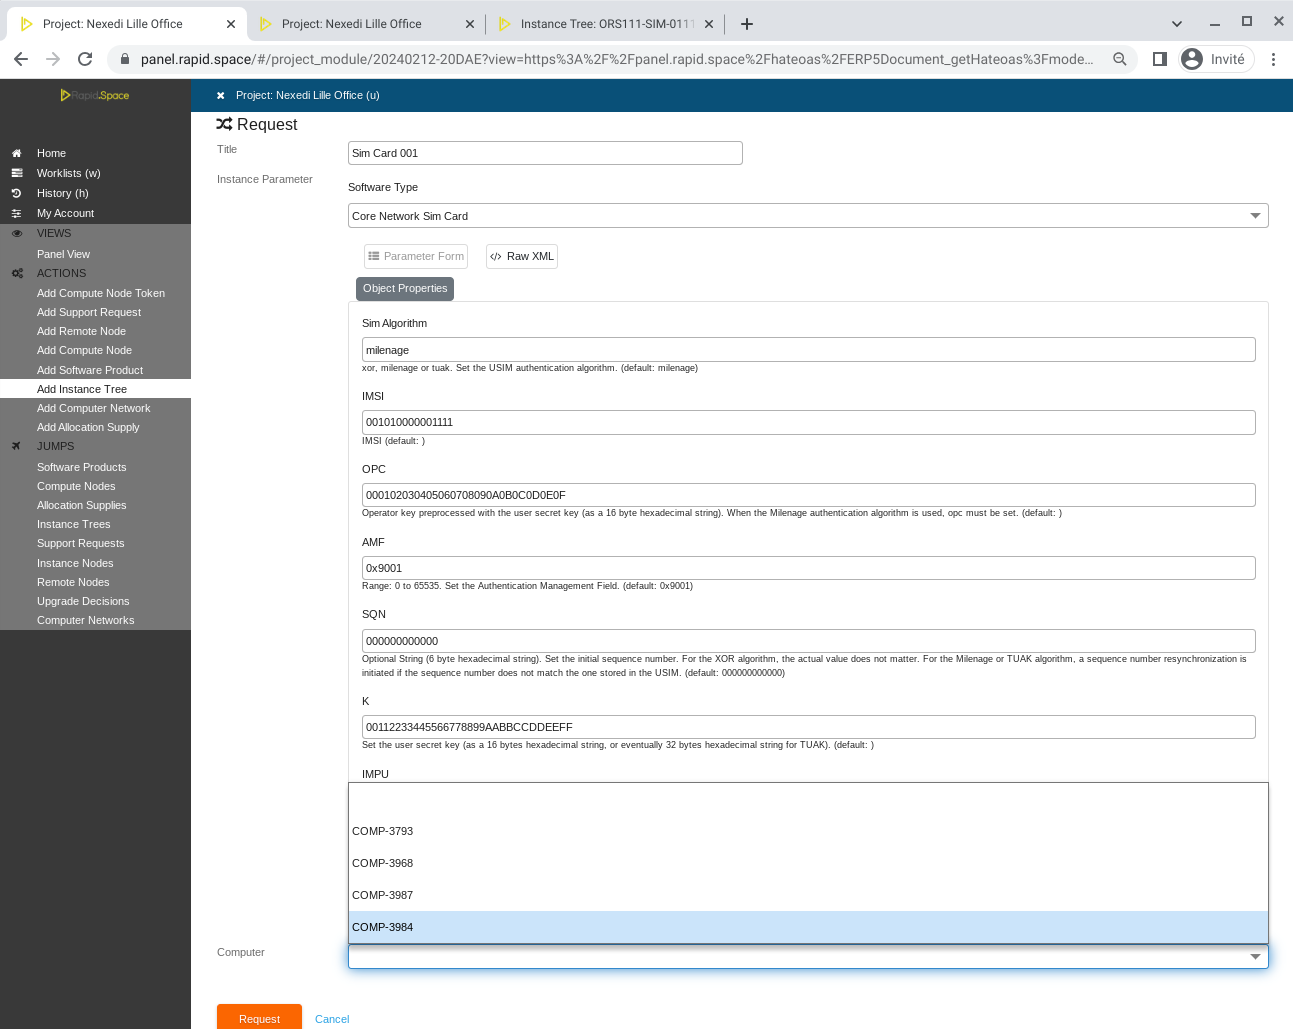
If you have multiple ORS, please get the computer reference of your ORS by going to "Compute Nodes" on your project page, and select it in the menu
Input your SIM Card parameters
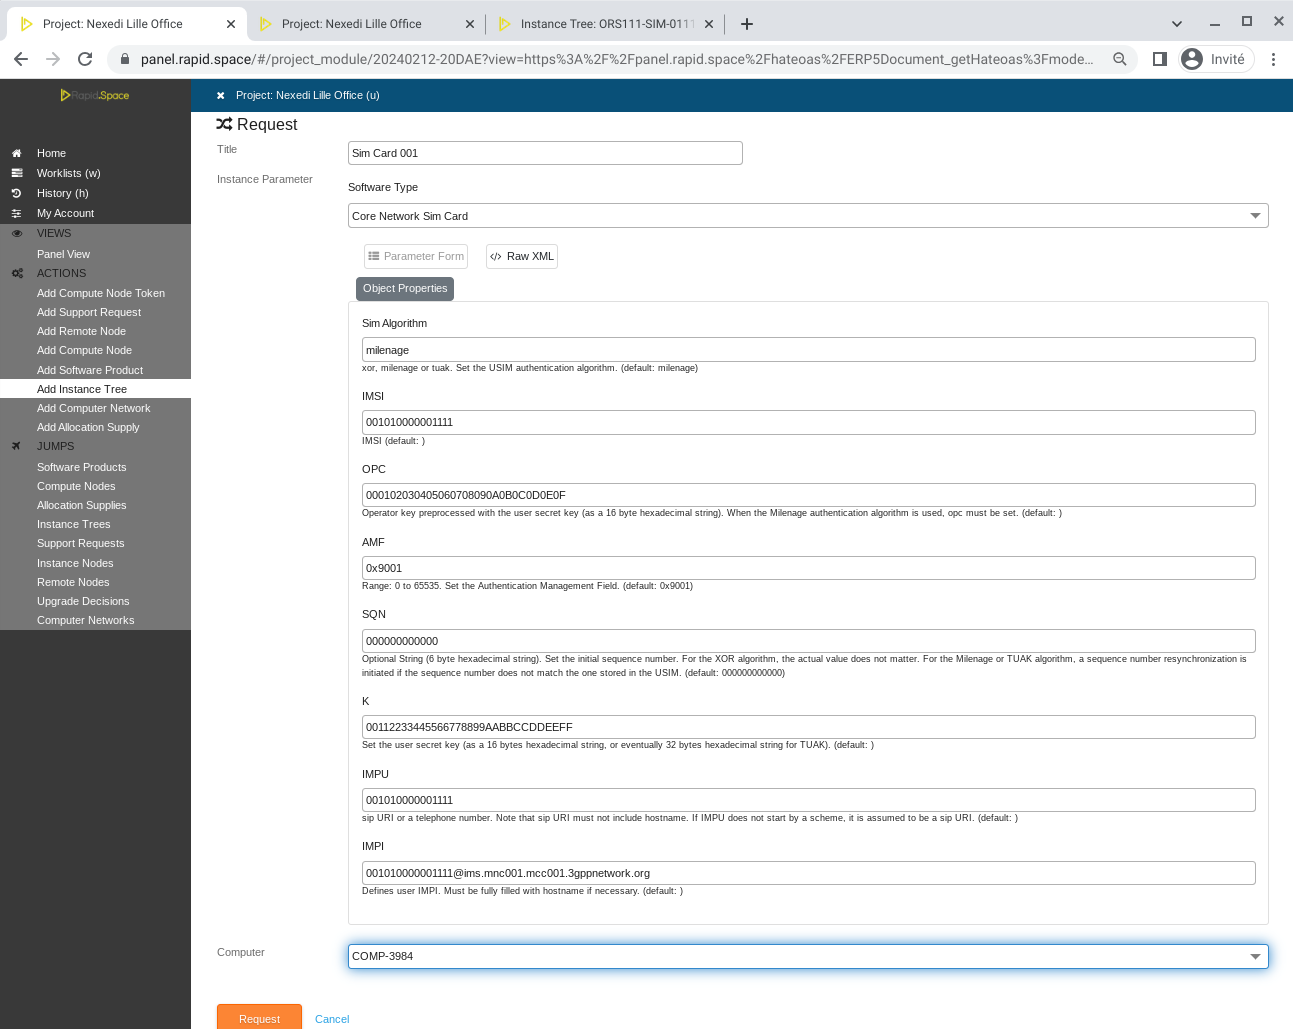
If you have multiple ORS, please get the computer reference of your ORS by going to "Compute Nodes" on your project page, and select it in this menu
Wait a couple of minutes
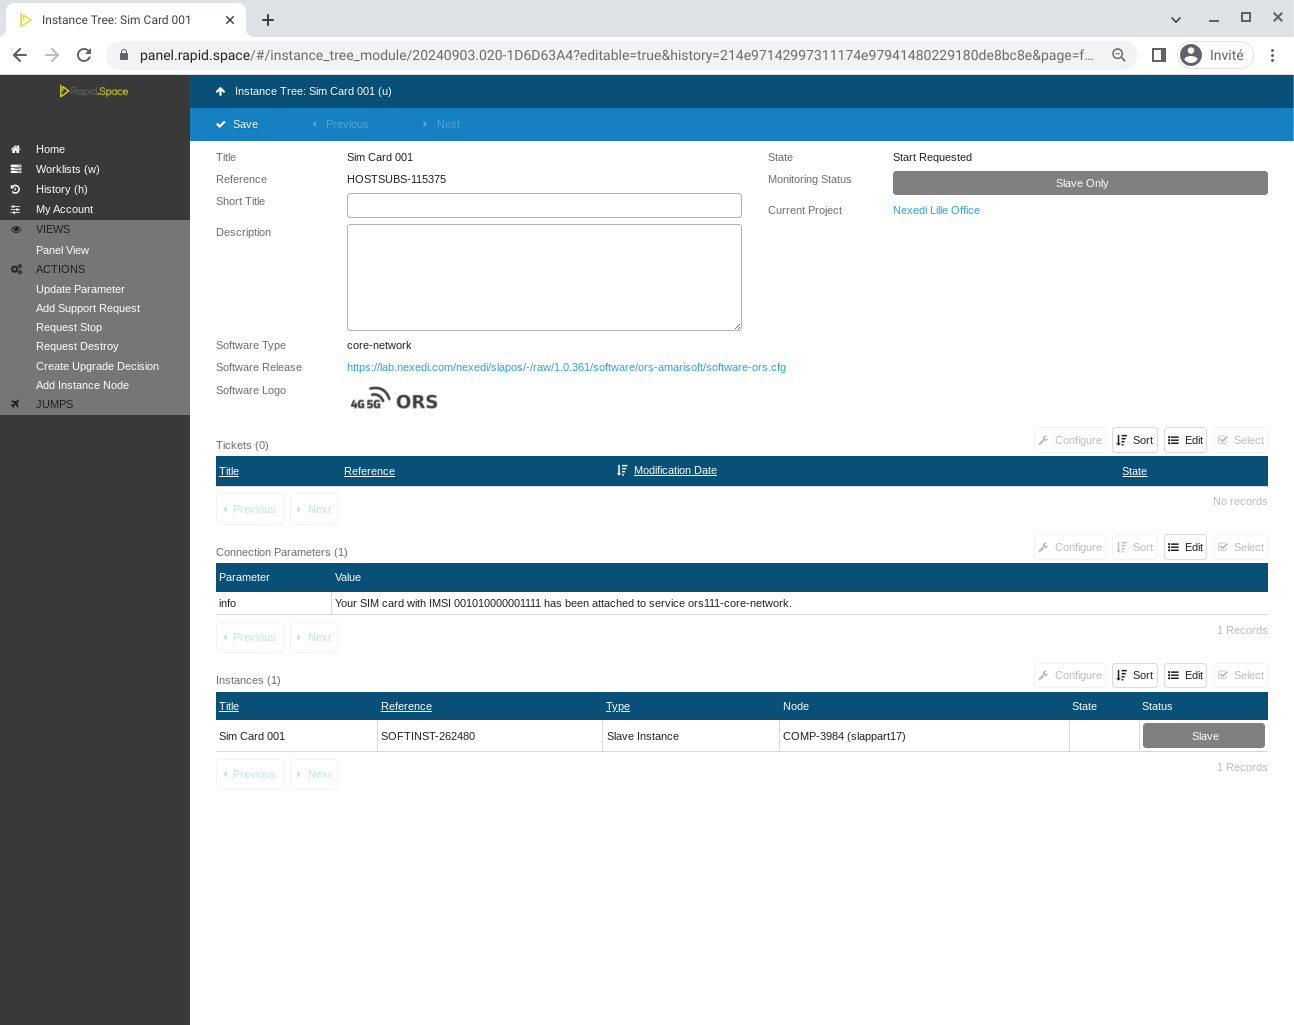
Please wait a couple of minutes and refresh until you see the message "Your SIM card with IMSI XXX has been attached to service orsXXX-core-network"
More