Requirements
This tutorial will show you how to manage your ORS on the Rapid.Space panel.
Find your services

In the "Services" section, you will find the list of your services. For each of your ORS you should have:
- orsXX-enb, orxXX-gnb and orsXX-core-network: eNB, gNB and Core Network services running Amarisoft Stack
- orsXX-conference and orsXX-mail-server: PTT Video Conference and Mail Servers, please refer to the MCPTT tutorial
- orsXX-health: here you will find many promises to check the health of your ORS machine such as CPU temperature. We strongly recommend you keep this started as we also use this service to monitor all ORS on the panel.
By default, only one eNB or gNB service will be started, you should not run multiple gNB or eNB services at the same time as ORS can only run one at a time.
Here is the meaning of the "Status" button:
- Green means the service is currently running without any errors
- Orange or red means the service is running but has some errors (a following section will show you how to investigate)
- Grey means the service is stopped.
Find the compute node corresponding to your ORS
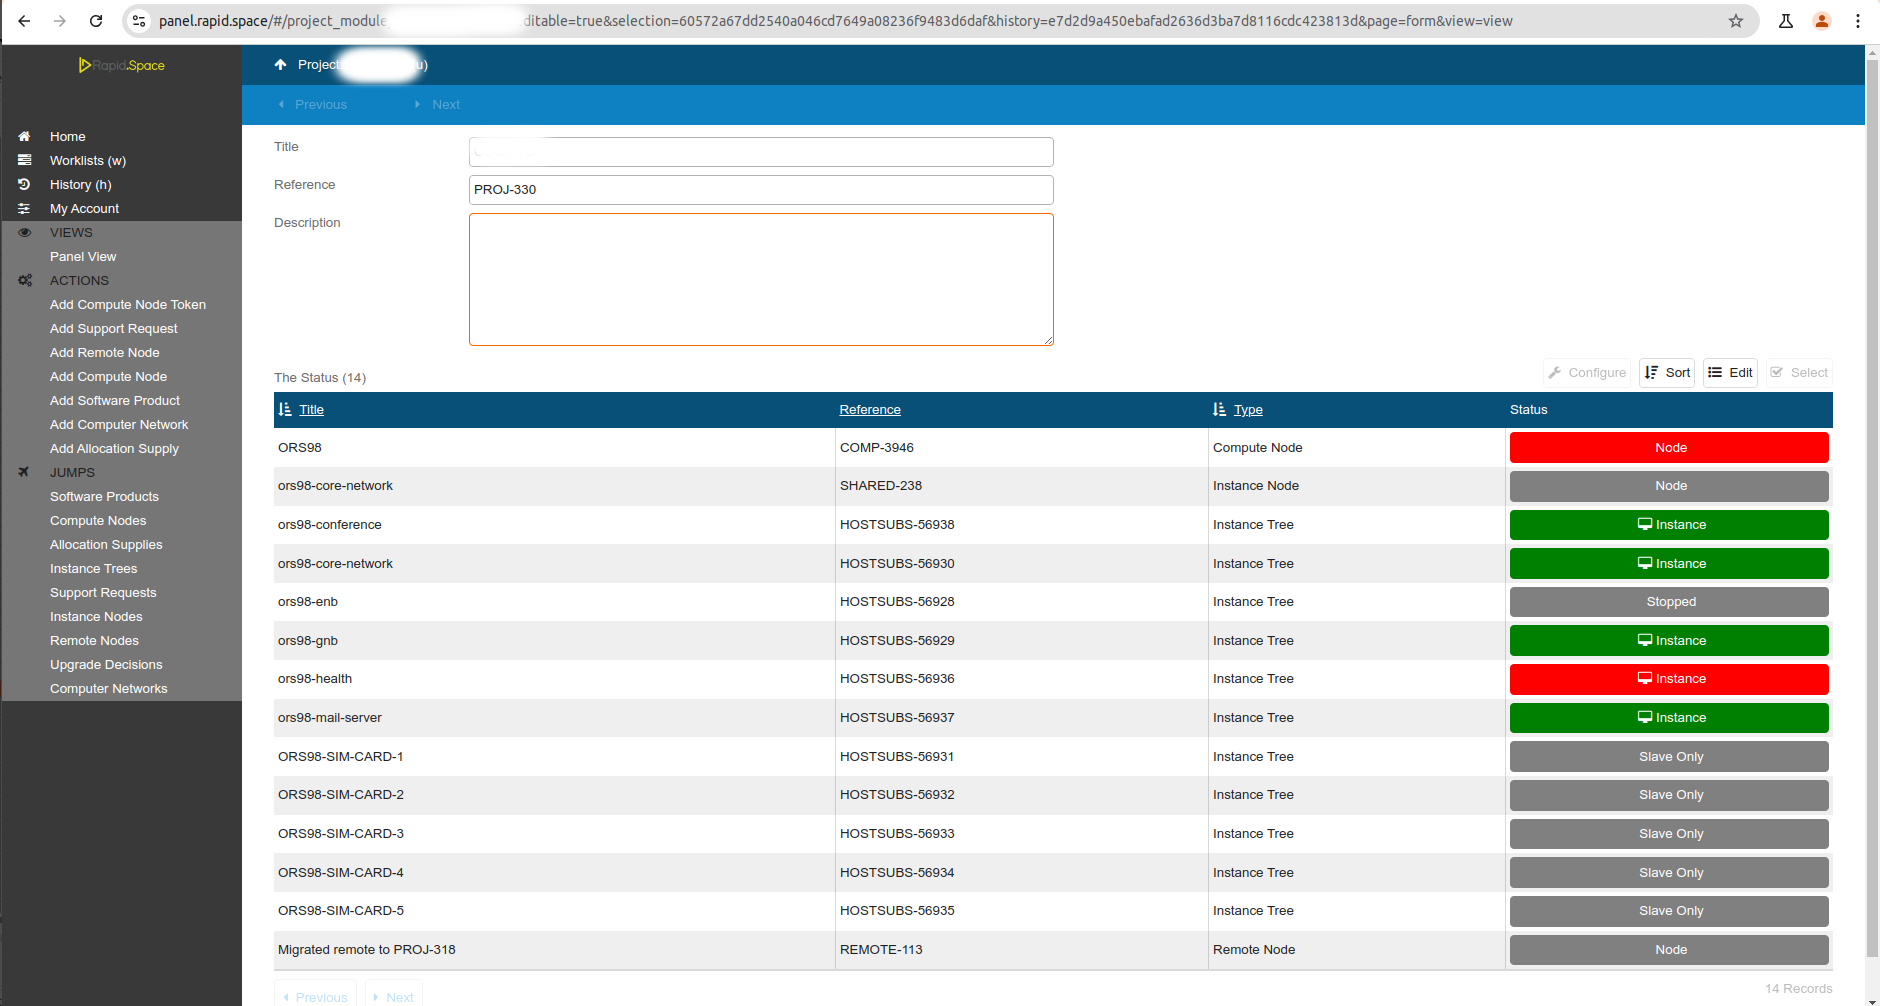
In order to see the compute node corresponding to your ORS, you need first to click on "Projects" then click on your project. In this view, you will see all the services and compute nodes belonging to your project along with their status. You should see an entry corresponding to your ORS. This represents the physical ORS. If the "Node" status is green, it means your ORS is correctly connected to internet.
Switch between 4G and 5G
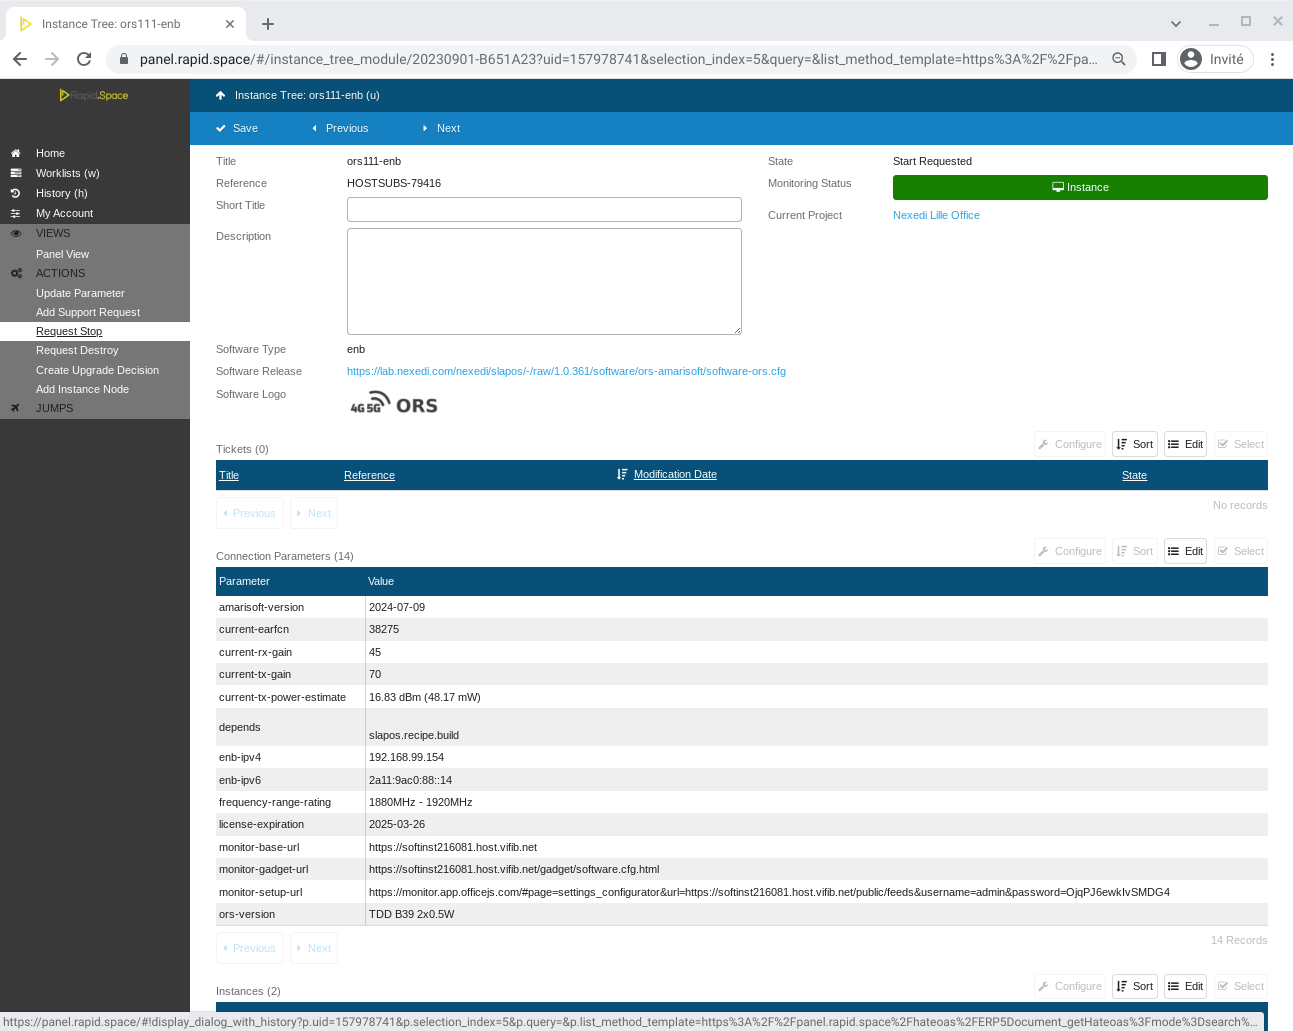
To switch between LTE and NR, you can stop and start the enb and gnb services. First go to your service, then click on the "Request Start" or "Request Stop" button on the left panel. Both services should not be started at the same time as ORS do not support 4G and 5G simultaneously.
Change the power, frequency, bandwidth, TDD UL/DL, etc...
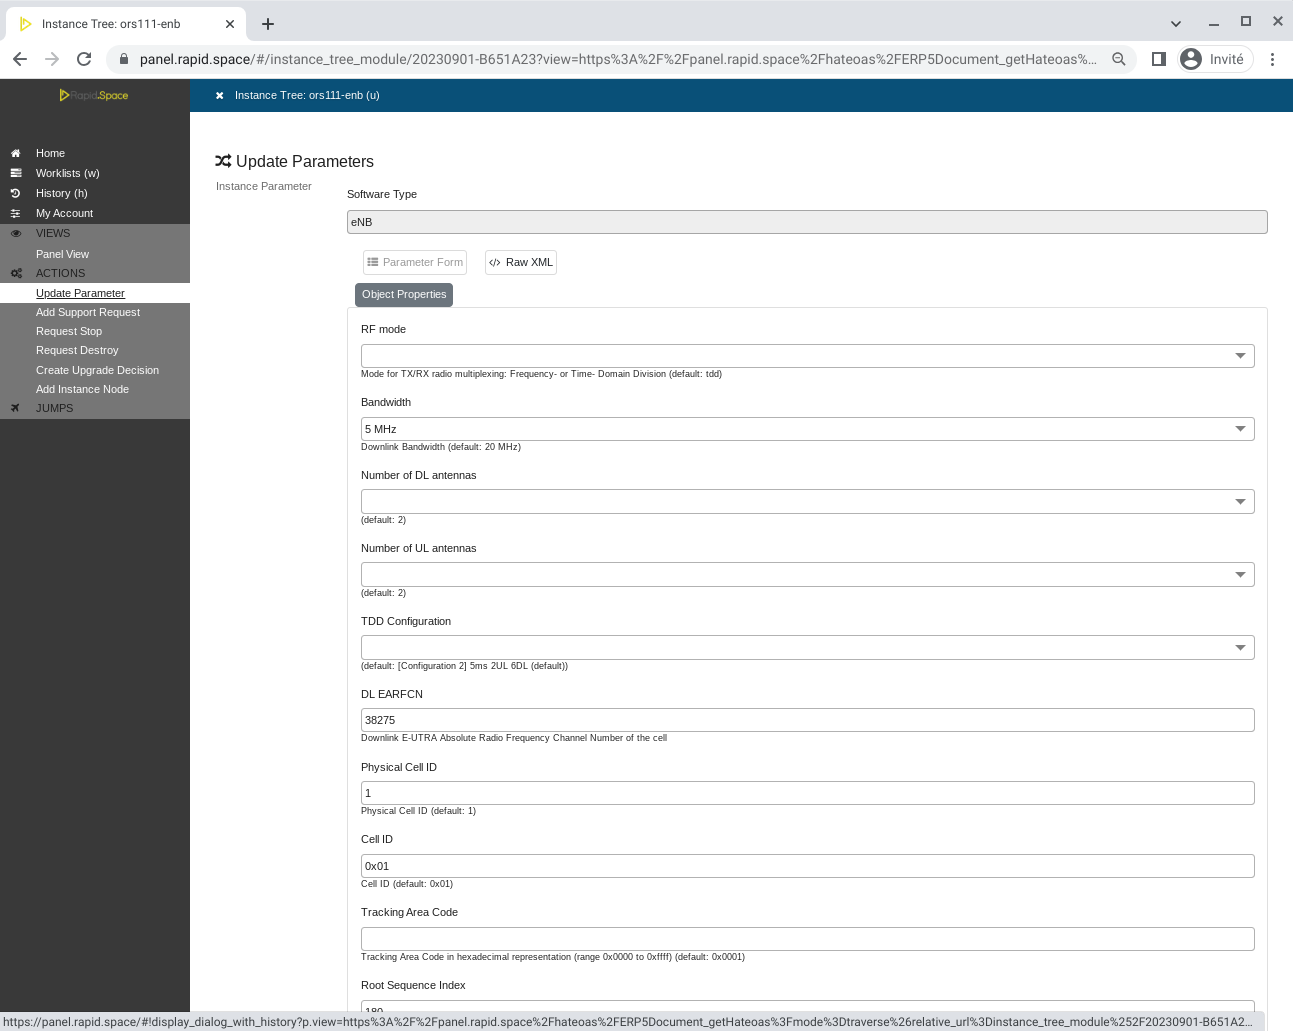
By default, all your services are configured with default parameters which should allow you to connect a phone without issue. However, you may want to customize these parameters to suit your needs.
You can modify the parameters of your service by going to your service and clicking the "Update Parameter" button on the left panel. Please read the sections below to get more details.
Adjust RF Power of your ORS (TX)
The first parameter you may want to change is the Transmission power (TX Gain), this controls how much power your ORS is emitting.
TX Gain should be set to a number between 0 and 89, everytime you increase it by 3 the power approximately doubles.
Please refer to this page to see a mapping of TX Gain to power depending on your ORS version: RF Power vs TX Gain
Adjust RF Power of your ORS (RX)
It is important to make sure your reception levels are high enough to communicate with UE properly but not too high to get saturated. If you have antennas around you emitting in the same frequency you might have to lower RX Gain or change the frequency to avoid the signal getting saturated.
To adjust the reception power, you can modify the RX gain parameter, it works the same way as TX gain and requires a value between 0 and 89.
To know which value to put, you need to check the outputs of the "check-rx-staturated" promise which will give you the reception levels received by both antennas of your ORS in real time. These values should be always be below 0 and should be around -10. Please read below the sections "Monitor your ORS" to learn how to read these values.
Adjust Central Frequency
To adjust the frequency at which you are emitting, you need to modify the DL EARFCN (Downlink E-UTRA Absolute Radio Frequency Channel Number, for 4G) or DL NR ARFCN (for 5G) parameters. You can use websites such as 5G Tools to calculate the DL EARFCN and DL NR ARFCN values from the frequency. Please make sure you do not go beyond the frequency range of your ORS. For instance, if you configure 1900 MHz as central frequency with 20MHz bandwidth your ORS will be emitting between 1890 MHz and 1910 MHz.
Other parameters to adjust
Here are some examples of other parameters you can change for the eNB/gNB and EPC software type:
- (NR only) NR band
- Bandwidth (20 MHz maximum for 4G and 40 MHz maximum for 5G)
- Cell ID, gNB ID, gNB ID number of bits, Physical Cell ID
- PLMN: 00101 by default, adding one changes the default PLMN and you can add as many as you want
- TDD Uplink / Downlink ratio: you can choose our maximum uplink configuration in 5G to get the highest uplink ratio, or ask us for more TDD configurations
- etc...
Add SIM Card
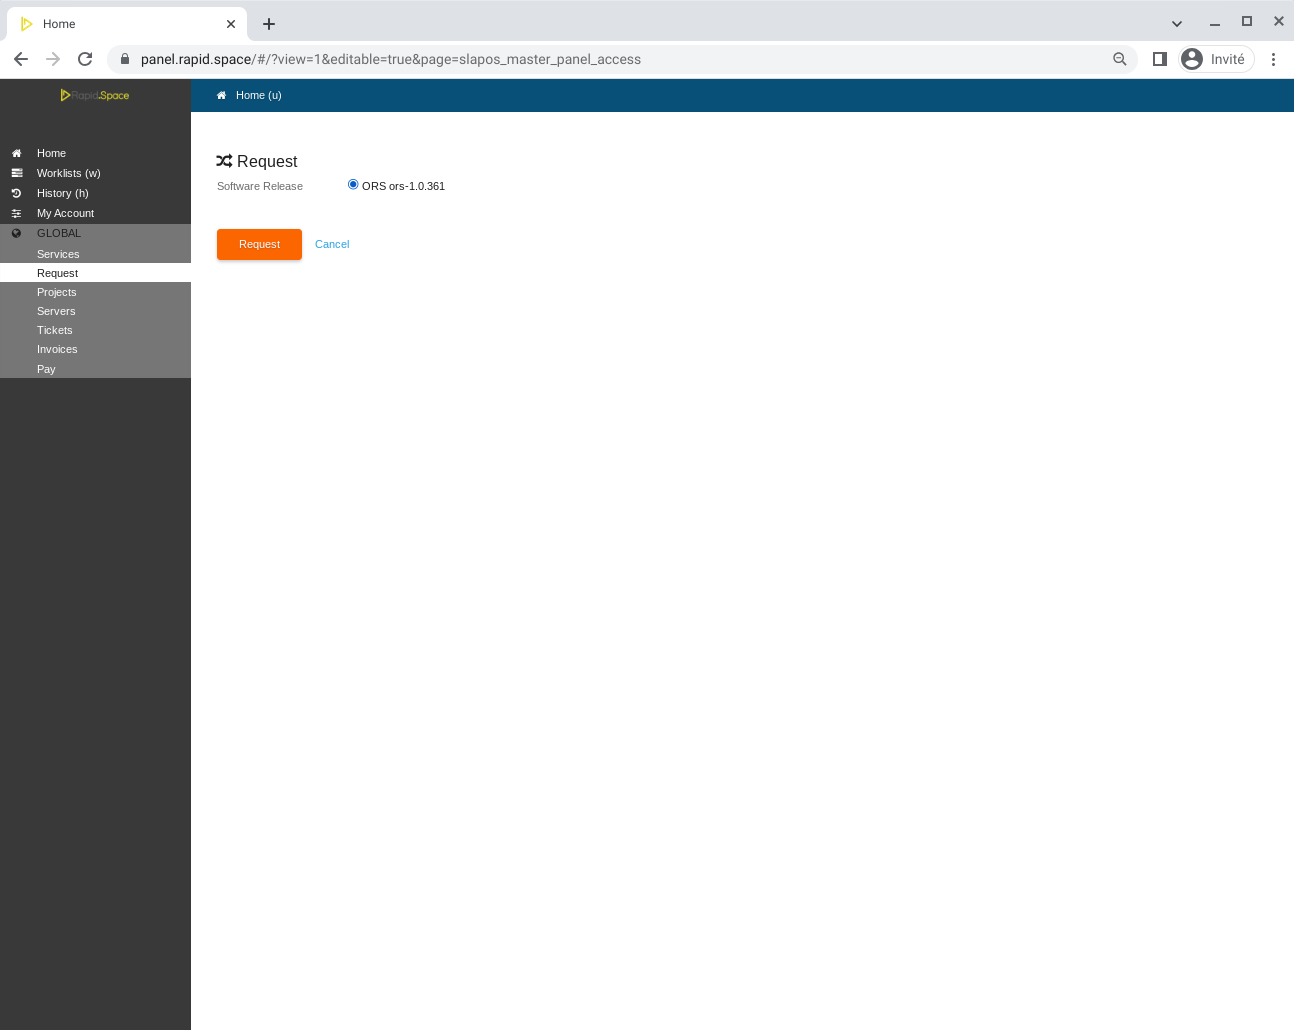
Click on Add Instance Tree
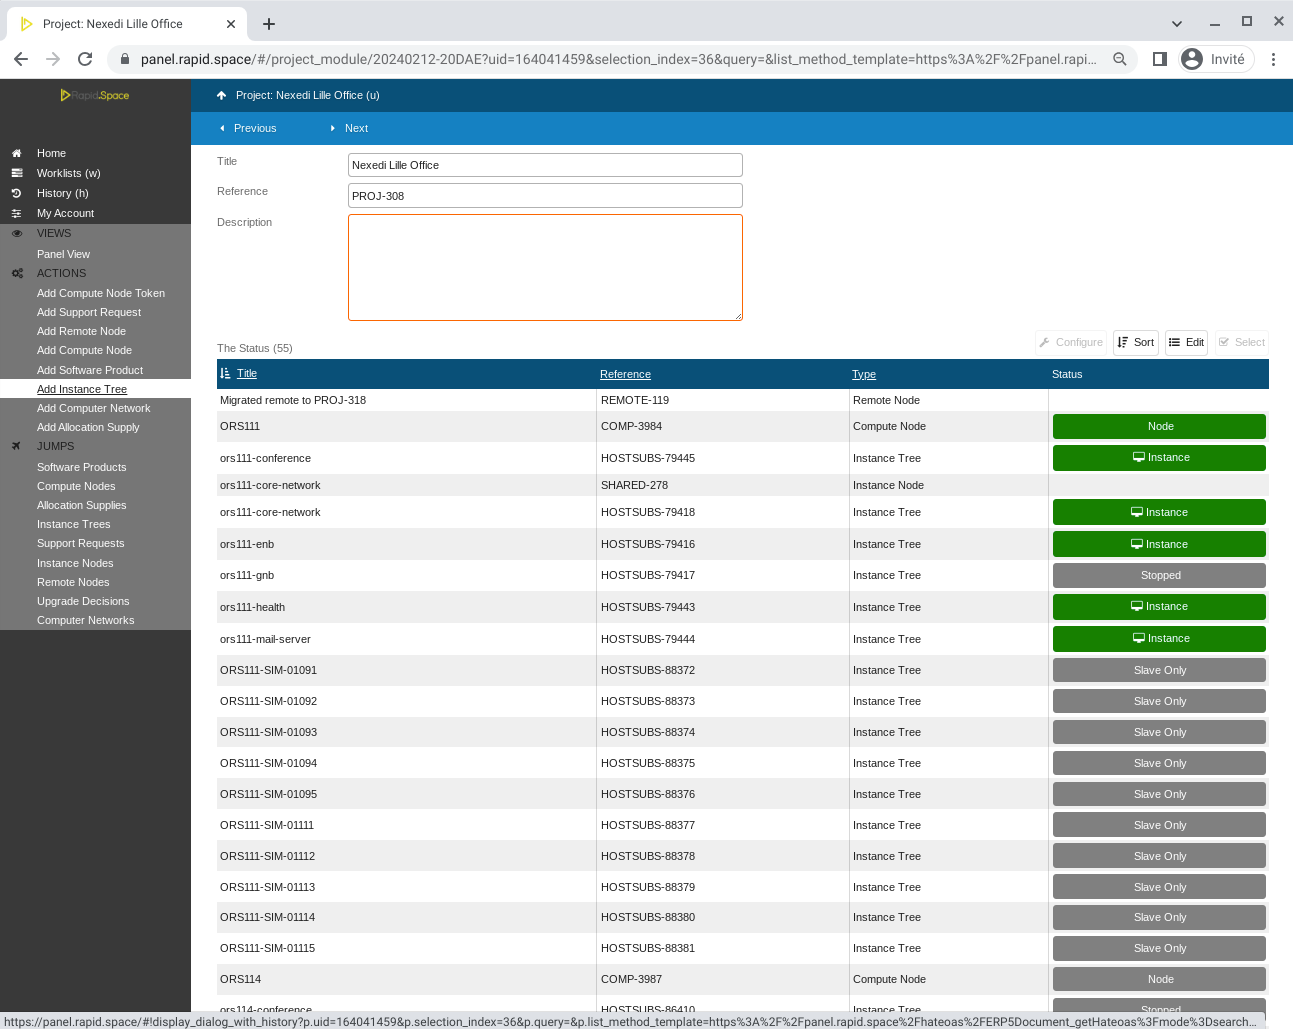
Go to your project and click on "Add Instance Tree"
Select ORS software
Select the computer reference
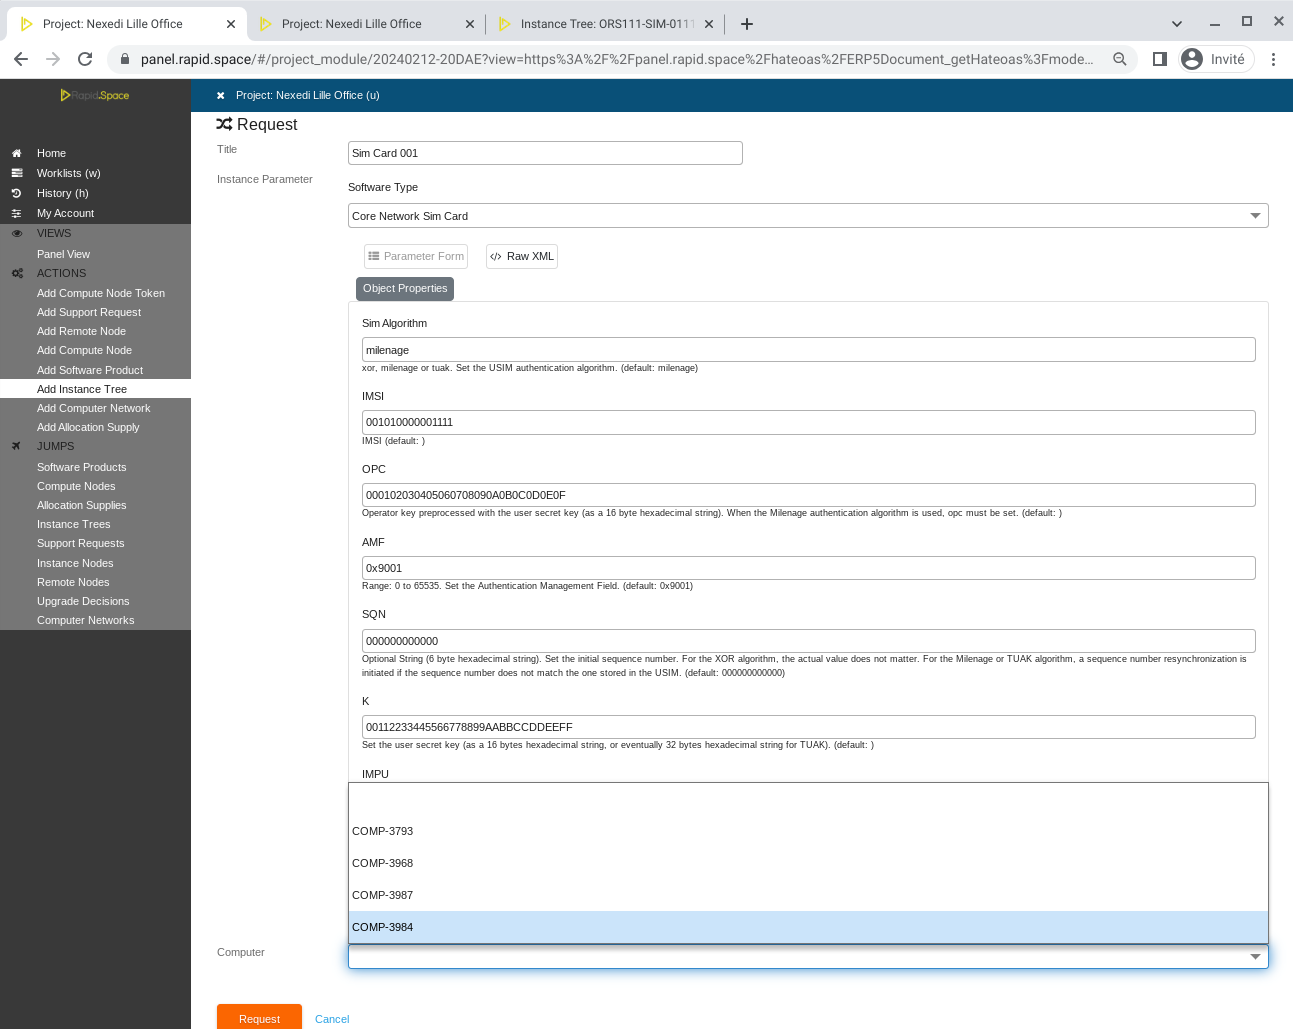
If you have multiple ORS, please get the computer reference of your ORS by going to "Compute Nodes" on your project page, and select it in the menu
Input your SIM Card parameters
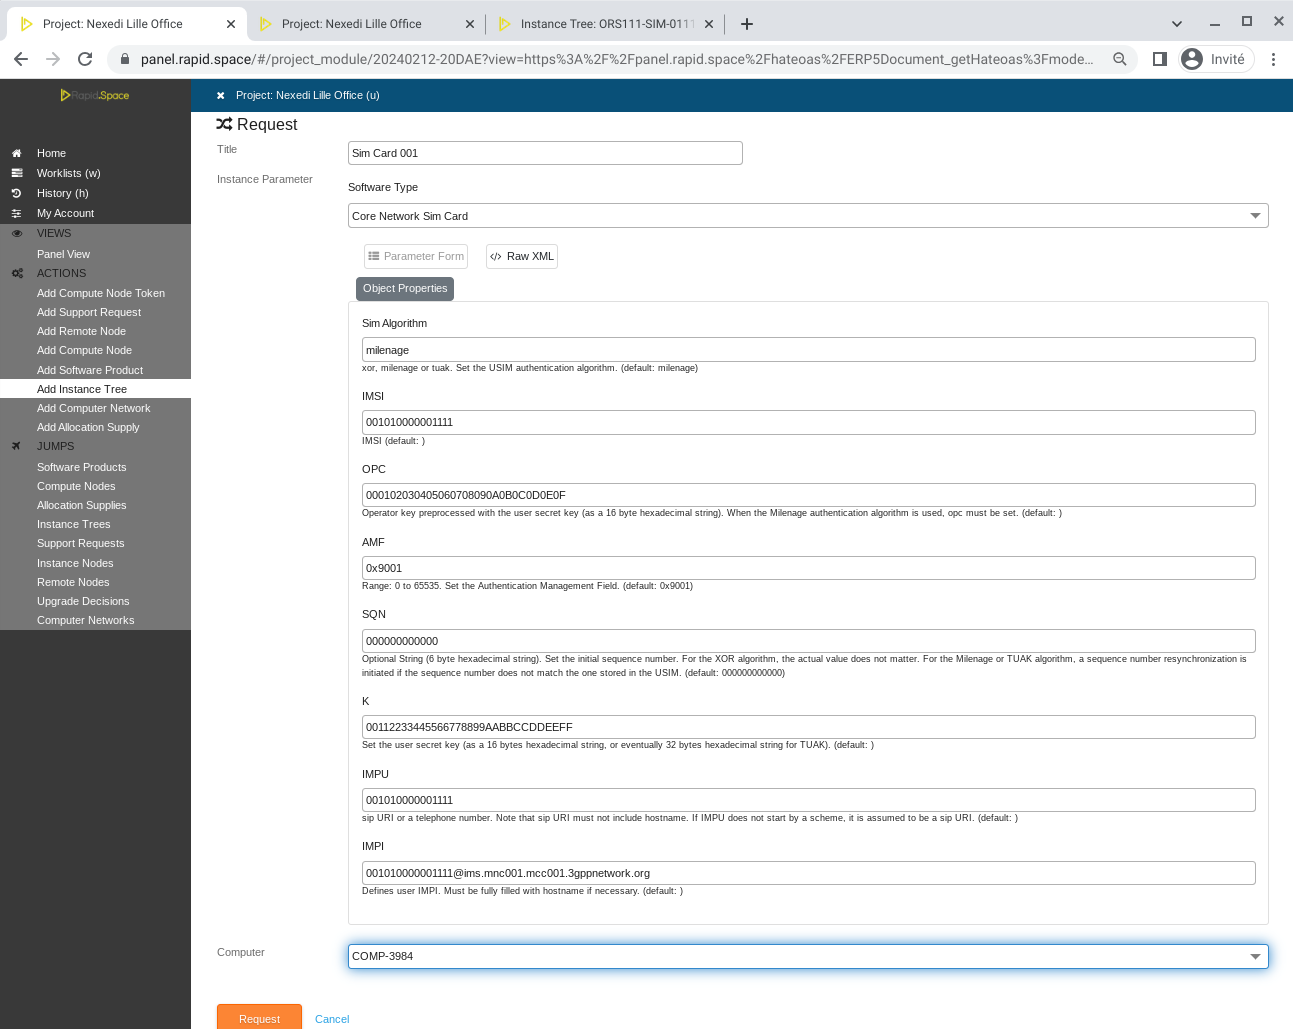
If you have multiple ORS, please get the computer reference of your ORS by going to "Compute Nodes" on your project page, and select it in this menu
Wait a couple of minutes
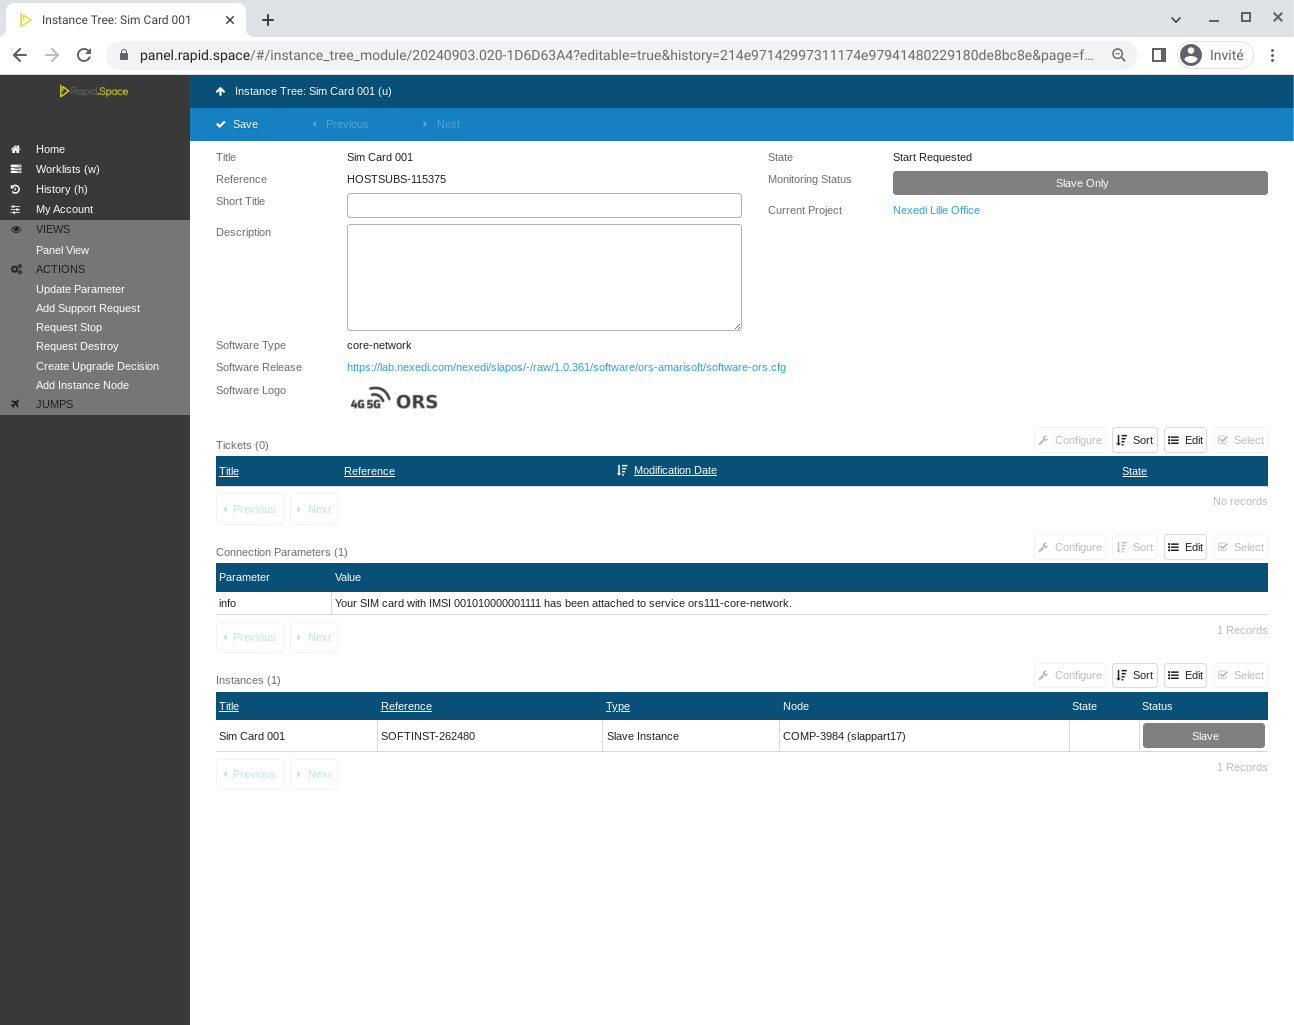
Please wait a couple of minutes and refresh until you see the message "Your SIM card with IMSI XXX has been attached to service orsXXX-core-network"